

Since I work virtually, there are quite a few people I work with whom I've never seen in person, so I had to enlist some help from someone who has actually seen the target in person. I say "target" because the bag is a surprise. I'm pretty sure she doesn't know I blog or sew, so I'm not too worried about spoilers...
My spy relayed to me the type of clothes the target wears, and we decided she shops at L.L. Bean or Lands End. Preppy. I can work with that.
I cruised the interwebs looking for inspiration and found some diaper bags by Pottery Barn that I used as my models for ideas. Choosing fabric was going to be hard. I wanted something fun, but sedate (no rocking horses or butterflies). Gender neutral...although we've been informed it's a girl, what if she has more and wants to use this bag again? Preppy. It's fall and I'm mad for plaid so I found a cute decor weight plaid for 50% off at Joann's.

I did the interior with a charcoal gray PUL from fabric.com. It has elastic pockets of varying sizes on the liner. Lots of places to stash diapers and whatnot.

The exterior has two pockets on the front, two side pockets, and a zipper pocket on the back. I used a pale yellow bias tape to accent the pockets since the plaid has a pale yellow ticking, I think it looks good! I also added a little detail to the handles, wrapping the tops of them in a little bit of the plaid for visual interest.

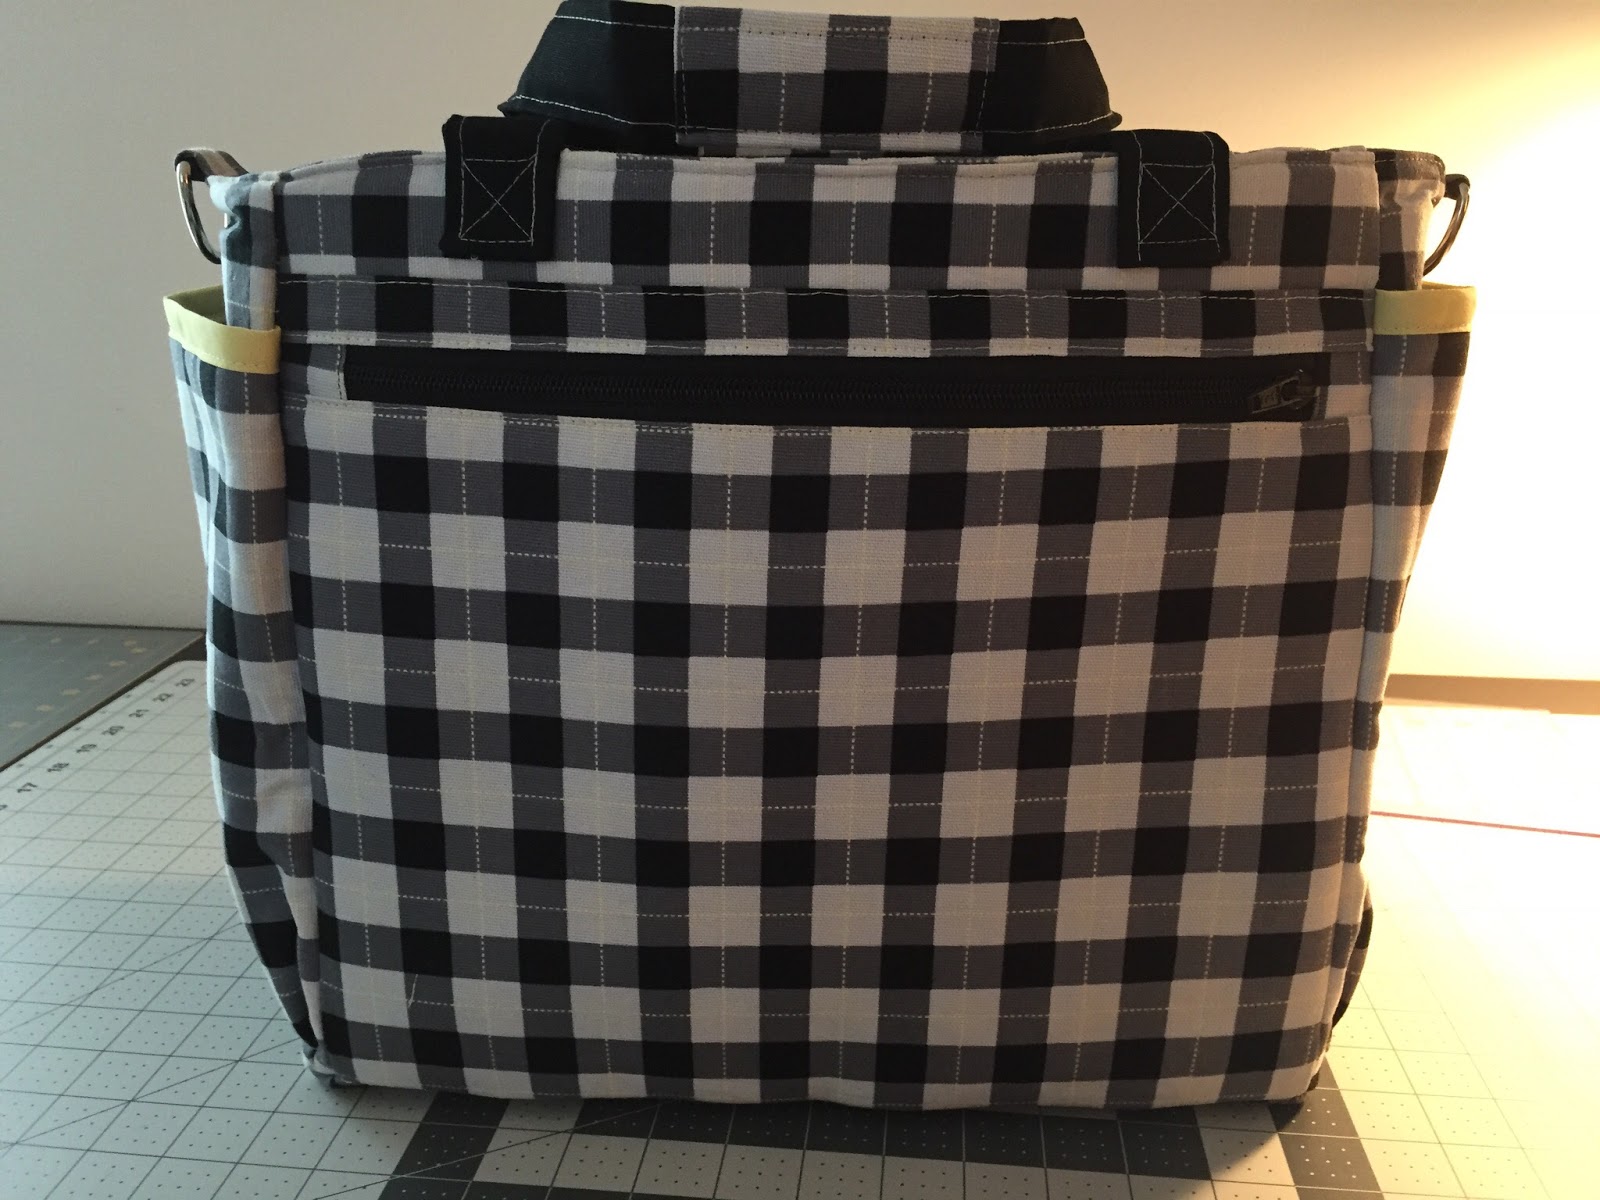

I am going to make an adjustable shoulder strap that attaches to two D-rings on the sides and can be removed if she just wants to rock this tote-style.
I think my favorite thing about this one is the recessed zipper. On one of the Pottery Barn bags I saw, I noticed the recessed zipper opened completely wide, and I really liked that. The zipper I happened to choose was a separating zipper and that really came in handy when piecing this together. I was going to add a tab at the end of the zipper but then decided I'd leave it open, allowing it to separate because I think that might be useful for the end user. In fact, I think I'm going to use this style on more bags in the future.


And, this is the first item to feature my new logo and tag for Holy Hardcore Handmade!

Some things I learned in making this bag:
- Hand Sewing is not my forte. Because I placed the tote handles so close to where the top hem would be, I wasn't able to topstitch around the top like I normally do. Because I had to leave a huge gap on the back for turning (basically left the whole back side open because the interfacing I used was so stiff), that meant that I had to do a hand stitch (ladder stitch or slip stitch) to close the bag behind those handles. My first attempt was so bad, I had to go back to the internet to find a video to show me how to do this correctly. Here's the video I found most useful from Professor Pincushion.
- Start a gusset at the bottom center and work your way up the sides. This is a lesson I had to re-learn on this project. I learned this when I reupholstered the ugly chair, but apparently I forgot. When I did the liner gusset, it was a little off on one side, which didn't really matter since it was the liner. But, I wanted the top of the front and side pockets to match up exactly, so I made sure to start the gusset at the bottom so that things didn't go all cattywampus on my way around.
- Planning is critical. Some projects I can kind of fly by the seat of my pants, but since this was going to be for someone else, I did a lot of planning, sketching, measuring and detailing steps in my notebook to ensure I didn't forget anything. Sometimes when I am too excited, I'll skip a step and have to rip things apart - not this time! I made sure to sit down and think about exactly how I was going to piece everything together, in what order, and it really made things go faster. My seam ripper was feeling a little neglected, which is a good thing.
- I love having a serger. Sewing this baby together was tough because at some points there were a lot of layers. I noticed that in some places, my regular machine was skipping stitches and so I serged the seams just for good measure.