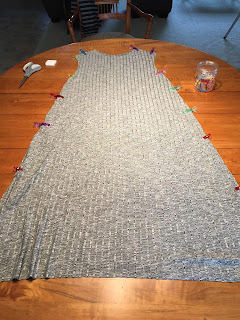
Making this dress was surprisingly easy. I looked around for some patterns but then decided that patterns are for pussies! Instead, I used a short sleeved t-shirt dress that fits well and used that to pattern my new dress.
I picked up a ribbed sweater knit fabric in a heather gray from Joann's and to maximize the fabric usage, I laid out flat and then folded it in to the middle (so I would have two folds to work with). I took my pattern dress and folded it in half, and laid it out on one of the folds.
Allowing a generous 1" for seam allowances, I cut around the pattern dress to create one side of the new dress.
Next, I took the piece I had cut from my fabric and used that as the pattern for the second piece, which I cut on the opposite fold. Hard to see in the picture below because it's acting like a chameleon, but I promise, it's there.
I sewed the shoulders together, left the arm holes open (unless you don't have arms, in which case, feel free to sew those shut), and then sewed the sides together. I did all of this with my serger. I serge everything now.
I will say that basically at every stage, I put the dress on to make sure I was going in the right direction. So, this is the first point I put the dress on (inside out) to make sure it fit correctly. I considered taking it in just a little bit but then decided to let it fly and leave it roomy. Another piece of advice is to start big and get smaller. You can't put more fabric in once you cut!
Next, I needed to add sleeves. I took another shirt that had good sleeves that I liked and used those as my next pattern. Similar to the body of the dress, I laid out the sleeve, armpit (or short end of the sleeve) away from the fold, because I wanted the seam on the underside of the sleeve and not on the top. I also allowed extra room for seam allowance on the raw edge and for the hem. Before I cut, I made sure that the arm hole opening matched up with the sleeve opening on the dress.
I serged each sleeve, right sides together, from the hand opening (I'm sure there's a term for that but I don't know what it is) up to the armpit and stopped. Again, need to leave that open so arms can go through!
To attach the sleeves to the body of the dress, I turned the sleeve right side out, and inserted it into the dress (which is inside out), so I had right sides together. Starting at the armpit, I lined up the seams and clipped it all the way around, making sure everything matched up correctly. I then serged this together.
Again, I put the dress on with one sleeve to ensure I had the first sleeve right. I didn't want to wind up with both sleeves sewn in and have to rip them both out. Fortunately I got it right on the first try.
Repeat for other sleeve.
Next up is the turtleneck collar. This wound up being more of a cowl neck because I did not understand the finer points of tapering to create a more fitting turtleneck, but it looks fine so I stuck with it. I just cut a rectangle. Well, I didn't "just" cut a rectangle...I took the piece of fabric and clipped it around the neck hole and added a smidge for seam allowance and then cut it.
Folded the rectangle in half, right sides together and serged it shut along the vertical edge.
Turned it right side out and folded it down in half. Similar to the sleeves, I placed the collar upside down inside the dress (which continues to be wrong side out) and lined up the raw edges right sides together. I clipped this and serged it shut. I did put my collar seam in the middle of the back and worked my way around.
Still inside out, I put the dress on again to test it out. I decided that the arms were too wide so I took them in a little. With it on, I pinched and pinned (along the seam edge, or the underside of the sleeve) and re-serged one sleeve to narrow it down. I then folded the dress in half and lined up the arms and basically drew a line (using a red sharpie because nothing else would show on this fabric) to guide me on the other arm so they would be even.
Put the dress back on. Again. Decide how long you want the sleeves to be. Pin and hem. Enter the twin needle...
I have never dared use my twin needle before, and wouldn't you know, I bent it after 2 stitches. However, the idea here is to get a nice cover stitch on the hems. Using a twin needle on a regular sewing machine gives a nice finish - on the right side, two even lines of stitches, but on the wrong side, it zigzags and encases the raw edge, similar to a serger! Who knew?
Here's the right side. You can barely see the stitching because it blends with the fabric, but it's there, I promise:
Wrong side: The twin needle zigzags the hem in place:
And voila, a new dress!


