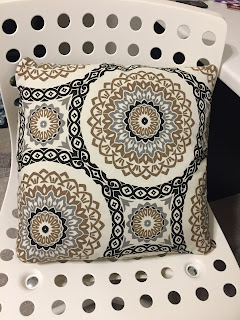
Materials
- Pillow Form (I used 16" x 16")
- 2 squares of home decor fabric (1" wider than your pillow for seam allowances)
- Invisible zipper (at least the length of the pillow)
- Invisible zipper foot (recommended for ease)
Here's how:
- Cut one square (actual square). I cut mine at 17" because my pillow forms were 16" x 16".
- Mark the centers of all four sides.
- Make a mark 1/2" up from the corner and 1/2" out. Do this on all 4 corners.
- Cut a line from the corner mark to the center mark on each side. Repeat this around all 4 corners.
This will result in a slightly-not-square square.
Use this not-so-square piece as a template to cut the other not-so-square piece.
If your fabric is likely to fray, you can run a zigzag stitch around the sides of each piece. I serged mine.
First, unzip your invisible zipper and take it to the iron to flatten it out a bit. Run the iron along the teeth to press the zipper tape open.
Next, place your zipper face down on the right side of your fabric not-so-square square. I had to refresh myself on invisible zippers because it's been a while and I put the zipper into the machine zipped up and realized the needle would go right through the center of the zip and I knew for sure that was wrong...you need to unzip it!
If you use an invisible zipper foot, it will make this much easier. The invisible zipper foot has little grooves to follow the zipper teeth and allow your stitches to get nice and close to the teeth (hence making the zipper appear invisible). However, don't go too fast. If you get off kilter just a bit, you'll wind up with stitches in the teeth, which makes it impossible to zip the zipper.
TIP: If your zipper is longer than the fabric, I would suggest leaving it long enough so you can have the zipper pull out of the way. I say this because I didn't do this the first time and when I got close to the pull at the end, it was really difficult to maneuver it out of the way because the needle is so close to the teeth and it took some gymnastics to get the zipper pulled back and out of the way to continue sewing. Plus, when it's zipped, the invisible zipper foot doesn't sit nice into the teeth groove (because now the teeth are together). So, leave it long if you can and tack it later in the process. Like this:
Once the zipper is attached to one piece, repeat the same on the other piece - zipper face down on the right side of the fabric, stitch along the teeth. You now have two pieces attached.
If you took my advice about leaving your zipper tape long, now is the time to bring the zipper pull into the middle and tack the long end. Use a tight zigzag stitch (using a regular presser foot) to create a bar tack. Cut the extra zipper tape off.
UNZIP the zipper at least half way. If you don't, there's no turning that fucker right side out. I've made this mistake several times with regular zippers and I've been able to wiggle them open with my seam ripper, but an invisible zipper is not going to allow that.
Fold your pillow not-so-square squares right sides together and line up the edges. Start at one corner of the zipper seam and sew the remaining sides together. Backstitch at both zipper ends to secure.
Clip your corners if needed to make them nice and neat. Turn the pillowcase right side out and stuff the pillow form inside. Zip her up and you're ready to go!


